Crusty Italian bread is a timeless classic, celebrated for its golden crust, airy crumb, and irresistible flavor. Whether you’re an aspiring baker or a seasoned enthusiast, perfecting this bread is an art worth mastering. This guide will take you through every aspect, from the key ingredients to advanced baking techniques. Let’s dive in.
What Makes Italian Bread Unique?
Italian bread stands out for its simplicity, relying on just a few high-quality ingredients to create a symphony of flavor. Unlike its French counterparts, Italian bread often incorporates olive oil, lending it a softer crumb while maintaining a crusty exterior. The result? A bread that pairs perfectly with soups, stews, or a drizzle of olive oil.
Italian bread has a rich cultural heritage, symbolizing tradition and hospitality. Every region in Italy has its variation, each with unique techniques and flavors.
The Appeal of a Crusty Texture
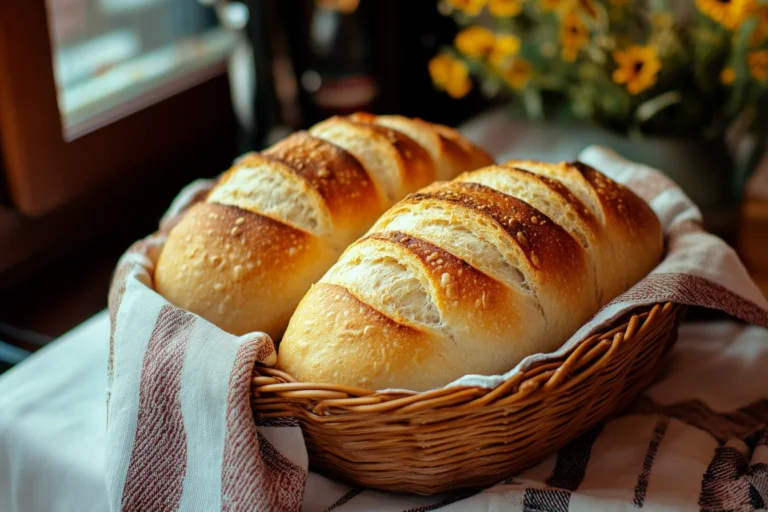
The crust of Italian bread is more than just a protective layer it’s an experience. That satisfying crunch, paired with the soft and airy interior, is what makes this bread iconic. Achieving this texture requires understanding the interplay of ingredients, hydration, and heat.
2. Key Ingredients for Crusty Italian Bread
Importance of Flour Quality
High-quality flour is the backbone of any good bread. For Italian bread, opt for unbleached bread flour, as its high protein content promotes strong gluten development, essential for that chewy texture.
- Tip: For an authentic touch, try Italian “00” flour for a finer crumb.
Types of Yeast: Active vs. Instant
The choice of yeast can significantly impact your baking process:
- Active Dry Yeast: Requires proofing in warm water, offering more control over rise times.
- Instant Yeast: Can be mixed directly into flour, ideal for quicker recipes.
The Role of Olive Oil
Olive oil is the secret ingredient that distinguishes Italian bread. It enriches the dough, adds flavor, and helps maintain a tender crumb. Use extra virgin olive oil for the best results.
3. Essential Equipment for Baking
Best Tools for Bread Making
Investing in the right tools can transform your baking:
- Mixing Bowls: Large, non-reactive bowls for mixing and rising.
- Bench Scraper: Ideal for shaping and dividing dough.
- Kitchen Scale: Ensures precise measurements, crucial for consistent results.
Using a Dutch Oven for Crust Formation
A Dutch oven is a game-changer for achieving a crackly crust. Its sealed environment traps steam, mimicking professional bread ovens. Preheating the Dutch oven before baking is critical for optimal results.
4. The Science Behind Crusty Bread
Understanding Gluten Development
Gluten is the network of proteins that gives bread its structure. Proper kneading aligns these proteins, creating elasticity and strength. Overworking, however, can lead to a dense crumb.
- Tip: Use the “windowpane test” to check if the dough is properly kneaded.
Hydration Levels and Their Impact
Higher hydration levels (70%-80%) contribute to an open crumb and crispy crust. However, wetter doughs can be challenging for beginners to handle. Start with moderate hydration and gradually increase as you gain confidence.
For a deeper dive into the science of bread baking and gluten development, check out this detailed guide
5. Preparing the Dough: Step-by-Step
Mixing and Kneading Techniques
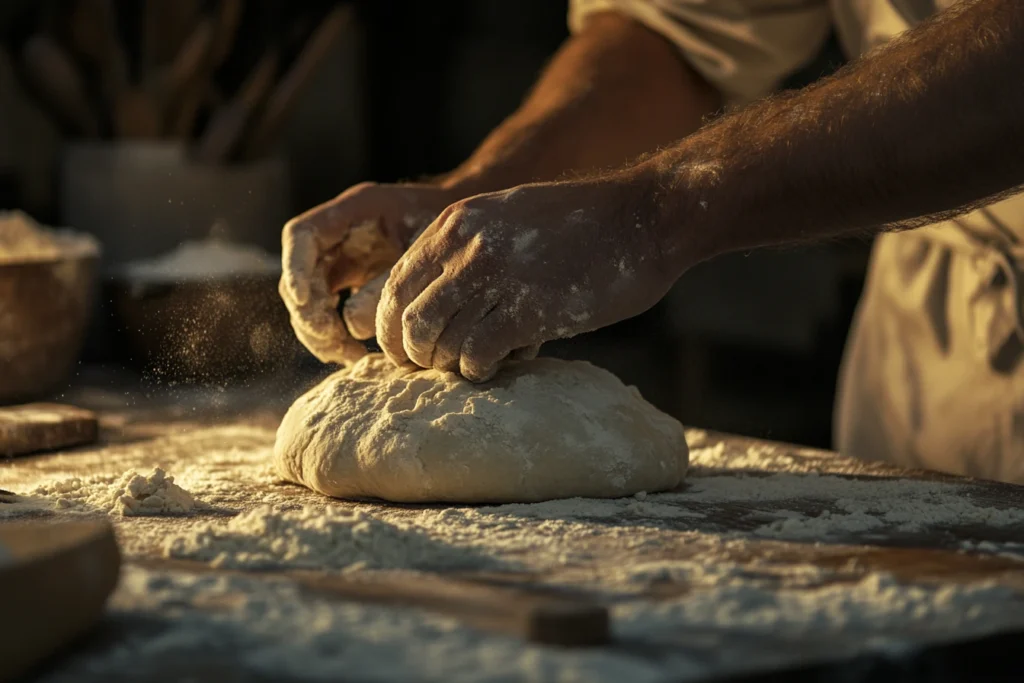
The process of mixing and kneading is where the magic begins:
- Combine flour, water, yeast, and salt in a mixing bowl.
- Gradually add olive oil while kneading to integrate it into the dough.
- Knead for 8-10 minutes until the dough becomes smooth and elastic.
Achieving the Right Dough Consistency
The dough should feel slightly sticky but not unmanageable. Adjust flour or water as needed to reach the ideal consistency.
- Pro Tip: Rest the dough for 10 minutes after initial mixing to make kneading easier.
6. The Importance of Fermentation
Benefits of Slow Fermentation
Slow fermentation develops complex flavors and improves digestibility. Refrigerating the dough overnight allows the yeast to work at a leisurely pace, resulting in a superior final product.
First Rise vs. Second Rise
- First Rise: Focuses on overall volume increase.
- Second Rise: Helps shape and refine the bread’s texture, ensuring even baking.
7. Shaping Italian Bread
Traditional Shapes: Loaf, Ciabatta, and Boule
Italian bread is as much about aesthetics as flavor. Here are common shapes:
- Loaf: Ideal for slicing and serving with meals.
- Ciabatta: Flat and rustic, perfect for sandwiches.
- Boule: A round, artisan-style loaf.

Tips for Perfect Shaping
- Use a light touch to avoid deflating the dough.
- Flour your hands and surface to prevent sticking.
8. Achieving the Signature Crust
Preheating the Oven
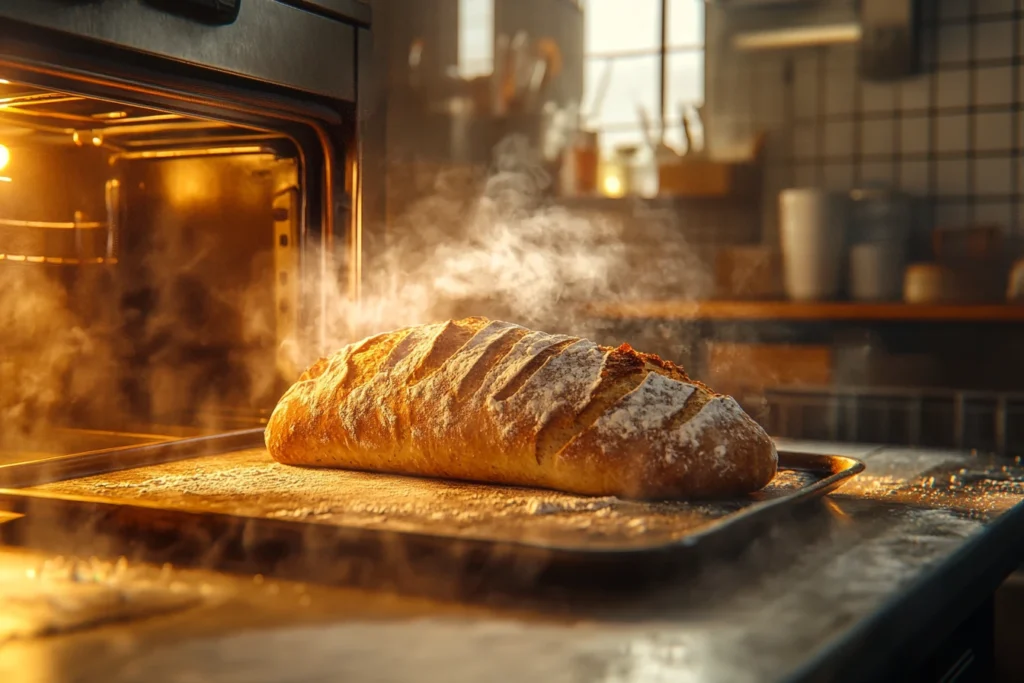
A well-preheated oven (450°F or higher) is essential for crusty bread. Heat helps the dough spring up, creating a light and airy interior.
Using Steam for Crusty Results
Introducing steam during the first 10 minutes of baking prevents the crust from forming too quickly, allowing the bread to expand fully.
- Methods: Place a tray of water in the oven or use a spray bottle to mist the dough.
9. Baking Techniques for Perfection
Proper Oven Temperature

Maintaining consistent oven temperature is critical. Use an oven thermometer to ensure accuracy, as built-in dials can be unreliable.
Timing and Monitoring Doneness
Bake until the crust is a deep golden brown and the bread sounds hollow when tapped. Typical baking times range from 25 to 40 minutes, depending on loaf size.
10. Cooling and Storing the Bread
How to Cool Properly to Retain Crispness
Cooling bread on a wire rack prevents the crust from becoming soggy. Allow at least one hour for cooling before slicing.
Storing Tips for Freshness
- Short-Term: Wrap in a cloth or paper bag to maintain the crust.
- Long-Term: Freeze slices in airtight bags for quick reheating.
11. Variations of Italian Bread
Adding Herbs and Flavors
One way to elevate your Italian bread is by incorporating herbs and aromatics. Popular choices include:
- Rosemary: Adds a fragrant, earthy aroma.
- Garlic: A staple in Italian cooking, infusing a savory punch.
- Sun-Dried Tomatoes: For a tangy and slightly sweet kick.
How to Add:
- Mix herbs into the dough during the kneading process.
- Alternatively, sprinkle them on top before baking for a decorative touch.
Whole Wheat or Sourdough Versions
For a healthier twist, swap some of the all-purpose flour with whole wheat. This not only increases the nutritional value but also gives the bread a nutty flavor.
- Sourdough Italian Bread: Use a natural starter to achieve a tangy flavor profile. This variation requires longer fermentation but rewards you with unparalleled complexity in taste.
12. Troubleshooting Common Issues
Why Is My Bread Too Dense?
A dense crumb often stems from under-kneading or insufficient proofing. Here’s how to fix it:
- Ensure proper gluten development by kneading until the dough passes the windowpane test.
- Allow enough time for fermentation. The dough should double in size during the first rise.
Fixing Overproofed or Underproofed Dough
- Overproofed Dough: Deflates easily and results in a flat loaf. Remedy this by gently reshaping and giving it a short second rise.
- Underproofed Dough: Produces bread with a tight crumb. Extend the proofing time in a warm, draft-free environment.
13. Pairing Crusty Italian Bread
Perfect Soups and Stews
Crusty Italian bread is a natural companion to hearty dishes. Some pairing ideas include:
- Minestrone Soup: The bread’s crusty texture contrasts beautifully with this hearty, vegetable-packed soup.
- Tuscan Bean Stew: Use the bread to soak up the rich, savory broth.
Serving with Cheese and Olive Oil
For a classic Italian appetizer, serve warm slices of bread with:
- Extra Virgin Olive Oil: Sprinkle with sea salt and cracked pepper for added flavor.
- Cheese Pairings: Fresh mozzarella, Parmesan, or a creamy ricotta.
14. Historical Context of Italian Bread
Origins of Rustic Italian Bread
Italian bread has ancient roots, dating back to the Roman Empire. Early recipes were simple, relying on locally available grains and wild yeast.
- Pane Toscano: A saltless bread that originated in Tuscany, perfect for pairing with salty dishes.
- Focaccia: One of the earliest forms of flatbread, beloved for its versatility.
Its Role in Italian Cuisine
Bread holds a symbolic place in Italian culture, representing family, tradition, and sustenance. It’s often featured in religious ceremonies and festive occasions.
15. Gluten-Free Alternatives
Crafting a Gluten-Free Italian Bread
For those with gluten sensitivities, crafting a gluten-free version is possible with the right ingredients:
- Flour Blends: Combine rice flour, tapioca starch, and xanthan gum for structure.
- Hydration: Gluten-free doughs require higher water content to compensate for the lack of elasticity.
Ingredients for Success
- Psyllium Husk: Acts as a binder and improves texture.
- Potato Starch: Adds lightness to the crumb.
16. Health Benefits of Homemade Bread
Nutritional Advantages
Homemade bread is free from preservatives, allowing you to control the quality of ingredients. Benefits include:
- Higher fiber content with the inclusion of whole grains.
- Reduced sodium compared to store-bought versions.
Avoiding Preservatives in Store-Bought Bread
Store-bought bread often contains additives to prolong shelf life. By baking at home, you ensure a cleaner, healthier product for your family.
17. Scaling Recipes for Larger Batches
Adjusting Ingredients and Proportions
When scaling recipes, maintain ingredient ratios to ensure consistent results. Use a kitchen scale for accuracy:
- Multiply ingredients proportionally.
- For yeast, adjust slightly less than linearly to avoid overly rapid fermentation.
Best Practices for Bulk Baking
- Use larger mixing bowls to accommodate increased dough volume.
- Divide the dough into manageable portions for even proofing and baking.
18. Enhancing Flavor with Fermentation
Using Poolish or Biga
Italian bread benefits greatly from pre-ferments like poolish or biga. These methods:
- Enhance flavor complexity.
- Improve crust texture.
How to Prepare:
- Mix equal parts flour and water with a pinch of yeast.
- Allow to ferment at room temperature for 12-16 hours.
Cold Fermentation Techniques
Cold fermentation slows down yeast activity, allowing for deeper flavor development. Refrigerate the dough for 12-24 hours before baking.
19. Regional Variations of Italian Bread
Differences Across Italian Regions
Every region in Italy has its signature bread, reflecting local traditions and ingredients:
- Pane Toscano: Saltless and ideal for dipping in olive oil.
- Pane Pugliese: Known for its open crumb and nutty flavor.
Recipes for Pane Toscano and Focaccia
- Pane Toscano: Mix flour, water, and yeast; omit salt for authenticity.
- Focaccia: Top with olive oil, sea salt, and fresh herbs for a savory treat.
20. Mastering Crusty Bread for Beginners
Simplified Recipe for Starters
For beginners, a basic recipe can help build confidence:
- Ingredients: Bread flour, water, salt, yeast, and olive oil.
- Steps: Combine ingredients, knead, proof, and bake in a preheated oven.
Common Pitfalls to Avoid
- Avoid over-flouring during shaping; it can dry out the dough.
- Monitor fermentation times to prevent overproofing.
21. Homemade Bread as a Gift Idea
Wrapping and Packaging Suggestions
Homemade bread makes a heartfelt gift, perfect for any occasion. Elevate the presentation with creative packaging ideas:
- Wrap the loaf in brown parchment paper and tie it with rustic twine.
- Add a sprig of rosemary or a personalized tag for a thoughtful touch.
- Use reusable bread bags for an eco-friendly option.
Bread as a Personalized Present
Pair your crusty Italian bread with artisanal olive oil, a small jar of pesto, or a wedge of aged cheese. These thoughtful additions transform your bread into a gourmet gift set.
22. Tips for Using Bread Machines
Adapting the Recipe for Bread Machines
While traditional methods yield exceptional results, bread machines offer convenience. To adapt your recipe:
- Follow the manufacturer’s instructions for ingredient order.
- Use the “dough” setting to mix and knead before transferring the dough for final shaping and baking in the oven for a better crust.
Pros and Cons of Automated Baking
Pros:
- Saves time and effort.
- Consistent kneading and proofing.
Cons:
- Limited crust development.
- Less control over fermentation and shaping.
23. Freezing and Reheating Italian Bread
Freezing Dough vs. Baked Bread
- Freezing Dough: Shape the dough into a loaf or boule before freezing. When ready to bake, thaw overnight in the fridge, then proof and bake as usual.
- Freezing Baked Bread: Wrap in plastic and store in an airtight bag. This method preserves freshness for up to three months.
How to Reheat Without Losing Crispness
Reheat frozen bread by placing it in a preheated oven at 350°F for 10-15 minutes. This revives the crusty texture while warming the interior.
24. Incorporating Italian Bread into Meals
Making Paninis and Bruschetta
Crusty Italian bread is a versatile base for many dishes:
- Paninis: Slice the bread into thick pieces, add fillings like mozzarella, tomatoes, and basil, and grill until golden.
- Bruschetta: Toast slices and top with chopped tomatoes, garlic, olive oil, and balsamic vinegar.
Using Leftovers for Breadcrumbs
Don’t let leftover bread go to waste. Transform it into breadcrumbs by:
- Allowing it to dry out, then pulsing in a food processor.
- Storing in an airtight container for future use in recipes like meatballs or casseroles.
25. Creating Artisan Bread at Home
Characteristics of Artisan Bread
Artisan bread is celebrated for its open crumb, golden crust, and deep flavor. Hallmarks include:
- Minimal use of commercial yeast.
- Longer fermentation times.
- High hydration levels.
Techniques for Artisan-Style Baking
- Use a pre-ferment like biga for enhanced flavor.
- Bake on a pizza stone to mimic a professional oven environment.
26. FAQs About Italian Bread Baking
Common Questions and Expert Tips
Q: Can I make crusty bread without a Dutch oven?
A: Yes! Use a pizza stone and place a tray of water in the oven to create steam.
Q: Why is my bread not rising?
A: Check yeast freshness and ensure your water temperature is between 95°F and 110°F.
Q: How do I know when the dough is proofed?
A: Press the dough gently. If it springs back slowly, it’s ready to bake.
27. Sustainable Bread Baking Practices
Using Organic Ingredients
Choosing organic flour and other ingredients supports sustainable farming practices and results in healthier bread. Look for locally sourced options to reduce your carbon footprint.
Reducing Waste in Baking
- Save scraps of dough to create rolls or breadsticks.
- Use leftover bread for croutons, panzanella salad, or bread pudding.
28. Advanced Techniques for Bread Enthusiasts
Laminated Dough Variations
Experiment with laminated doughs, which involve layering butter into the dough for a flaky texture. While not traditional, it’s a fun way to elevate your baking skills.
Experimenting with Natural Starters
- Cultivate a sourdough starter for a tangy flavor and natural leavening.
- Incorporate local wild yeasts for a truly unique loaf.
29. Seasonal Italian Bread Recipes
Holiday Specialties (Easter, Christmas)
Italian bread often takes on a festive flair during the holidays:
- Pane di Pasqua: A braided Easter bread with dyed eggs woven into the design.
- Panettone: A sweet bread filled with dried fruit, traditionally enjoyed at Christmas.
Summer Herb Breads
Infuse your bread with seasonal herbs like basil, thyme, or oregano for a fresh summer loaf. Serve alongside grilled vegetables or seafood for a light, flavorful meal.
30. Conclusion and Inspiration
Recap of Key Techniques
From understanding gluten development to mastering the perfect crust, this guide has covered everything you need to know about crusty Italian bread. Each step, ingredient, and tool plays a role in crafting the perfect loaf.
Encouraging Readers to Experiment
Don’t be afraid to experiment! Baking is as much about creativity as it is about technique. Try adding new flavors, exploring regional variations, or perfecting your shaping skills.
More FAQs:
- What’s the difference between ciabatta and focaccia?
Ciabatta is a rustic, airy loaf, while focaccia is flat and often topped with olive oil and herbs. - How do I avoid a soggy bottom crust?
Bake on a preheated pizza stone or in a Dutch oven to ensure even heat distribution. - Can I substitute all-purpose flour for bread flour?
Yes, but the bread may be less chewy due to the lower protein content. - Why is my crust too hard?
Overbaking or insufficient steam can make the crust overly tough. Adjust your baking time and hydration. - What is the ideal water temperature for yeast?
Between 95°F and 110°F for active dry yeast to bloom properly. - How long should I knead the dough?
Around 8-10 minutes by hand, or until it passes the windowpane test. - What can I use instead of olive oil?
Try grapeseed or avocado oil, but olive oil provides a traditional flavor. - Can I bake bread at a lower temperature?
Lower temperatures may affect crust formation and crumb structure. Stick to 450°F for best results. - Is it okay to let the dough rise too long?
Overproofing can result in deflated, dense bread. Keep an eye on rise times. - What makes artisan bread different from regular bread?
Artisan bread emphasizes traditional techniques, minimal ingredients, and longer fermentation.

